 English
 中文简体
中文简体 Español
Where Is the Ignition Relay Located? The Direct Answer
The ignition relay is most commonly found inside the fuse box located under the hood of your vehicle, typically in a large black plastic enclosure near the battery or along the driver's side inner fender. On some vehicles, a second fuse and relay panel sits beneath the dashboard, usually on the driver's side near the footwell. These are the two locations you should check first when trying to locate the ignition relay.
Once you have the fuse box open, refer to the diagram printed on the inside of the cover. This diagram labels each relay and fuse slot. The ignition relay is typically identified by its function name — it may be labeled as "IGN," "Ignition," "IG1," "IG2," or similar designations depending on the manufacturer. If the label is worn or unclear, your vehicle's owner's manual or a factory service manual will contain a detailed fuse box diagram that pins down the exact slot.
It is worth noting that not every vehicle has a component specifically called an "ignition relay." Different manufacturers use different naming conventions and system designs, which means the relay you are looking for might go by a different name depending on your car's brand. Understanding the variations by make is essential before you start pulling relays blindly.
How the Ignition Relay Works and Why Its Location Matters
The ignition relay acts as an electrically controlled switch between the battery and the vehicle's ignition system components. When you turn the ignition key to the "On" position, a small control current from the ignition switch activates the relay's internal electromagnet. That electromagnet then closes a set of heavier contacts, allowing a much larger current to flow from the battery to components such as the fuel pump, ignition coils, and engine control module.
This design exists because the ignition switch itself is not built to carry high amperage loads safely. Running 20, 30, or 40 amps directly through the ignition switch would overheat the steering column wiring over time. The relay handles the heavy current instead, while the ignition switch only carries the small trigger signal. This is why a failed relay can completely disable the vehicle even though the ignition switch itself is perfectly fine.
Because the relay sits in the engine bay fuse box in most vehicles, it is exposed to heat, moisture, and vibration throughout its service life. Corrosion on the relay's contact pins or inside the relay socket is one of the leading causes of relay failure, which is why checking the relay's socket for green oxidation or burned terminals should always be part of any relay diagnosis.
Ignition Relay Location by Vehicle Brand
The physical location of the relay and what it is called varies meaningfully from one manufacturer to the next. The table below summarizes the most common arrangements found across popular vehicle brands.
| Manufacturer | Relay Name | Typical Location |
|---|---|---|
| Honda / Acura | PGM-FI Main Relay / Ignition Relay | Under dashboard on driver's side or engine bay fuse box |
| Toyota / Lexus | EFI Main Relay / IG1 Relay / IG2 Relay | Engine compartment fuse box or instrument panel junction block |
| Ford | PCM Power Relay / EEC Power Relay | Engine compartment fuse/relay box (driver's side fender area) |
| Chrysler / Dodge / Jeep | Automatic Shutdown (ASD) Relay | Power Distribution Center (PDC) under the hood |
| General Motors (Chevy, GMC, Buick) | PCM Ignition Relay / Engine Control Relay | Engine fuse block under the hood |
| Hyundai / Kia | Engine Control Relay ON / IGN Relay | Engine compartment relay box |
| Subaru | IG2 Relay / Starter Relay | Engine compartment fuse box (IG2); cabin fuse box (Starter Relay) |
For example, the Honda Accord (2003–2007) places the ignition relay in the R2 position of the under-hood fuse box, which is the upper-left relay when facing the box from the side of the three fuse rows. The 2007 Chevrolet Equinox positions its ignition relay in slot 31 of the engine compartment fuse box. These differences confirm why checking your specific vehicle's fuse box diagram is a non-negotiable first step rather than guessing.
Step-by-Step Guide to Finding the Ignition Relay on Your Vehicle
Locating the ignition relay does not require special tools in most cases. Working through the following steps in order will get you to the right component without wasted effort.
Step 1 — Gather Your Reference Material
Before opening anything, pull out your owner's manual. Most owner's manuals contain a fuse and relay chart that identifies each component by number and slot. If the manual is unavailable, the fuse box cover diagram is your next best resource. For older vehicles or rare models, a factory service manual (available through dealerships or online subscription services like Alldata or Mitchell1) provides the most accurate relay layout.
Step 2 — Locate the Fuse Boxes
Most modern vehicles have two fuse and relay panels: one in the engine bay and one inside the cabin. The engine bay box is usually near the battery or along the driver's side inner fender wall. The interior box is commonly located beneath the steering column or inside the glove box area. Some vehicles add a third distribution center beneath the rear seat or in the trunk, though this is less common for ignition-related relays.
Step 3 — Read the Fuse Box Diagram
Open the fuse box cover and look for the diagram on its underside. Identify any relay slot labeled with terms like "IGN," "Ignition," "IG1," "IG2," "EFI," "PGM-FI," "ASD," or "PCM PWR." These are the candidates you want to investigate. If multiple relay slots seem plausible, cross-reference with the vehicle's service documentation.
Step 4 — Identify the Relay Physically
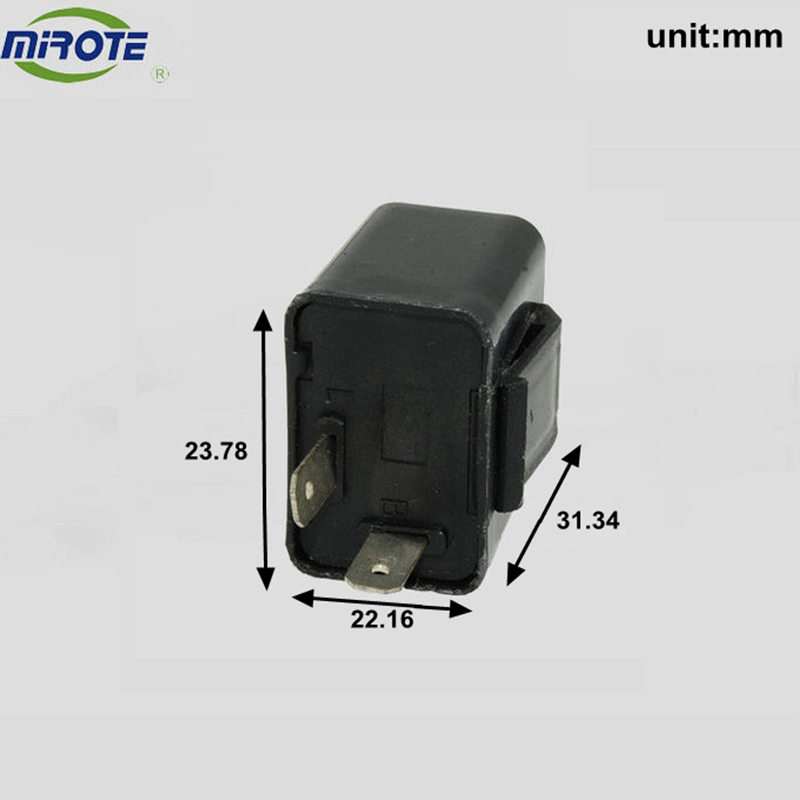
The ignition relay is a small rectangular or square component — typically about the size of a matchbox — that plugs directly into the relay panel. Standard automotive relays used in most passenger cars measure roughly 29 mm × 29 mm × 25 mm, with four or five metal pins on the underside. The relay body is usually black or dark gray. Most relays in the same fuse box are identical in shape, which is actually useful: you can swap a suspect relay with a known non-critical relay (such as a seat heater relay or rear wiper relay) to test whether the ignition relay is faulty before buying a replacement.
Step 5 — Confirm the Position Using the Pin Numbers
Turn the relay over. Standard 4-pin automotive relays carry the numbers 30, 85, 86, and 87 stamped on the casing. Pin 85 and 86 are the control coil terminals; pins 30 and 87 carry the switched load. If the numbers match this pattern and the position matches your fuse box diagram, you have located your ignition relay.
Signs That the Ignition Relay Has Failed
A failing ignition relay produces recognizable symptoms that affect the entire vehicle rather than just one isolated component. Because the relay controls power to the fuel pump, ignition coils, and often the engine control module, its failure tends to cause broad, system-wide problems.
- Engine fails to start with no crank response: When the relay's internal contacts fail in the open position, no power reaches the starter circuit or ignition system. The vehicle may be completely unresponsive when the key is turned, even though the battery is fully charged and all accessories work normally.
- Sudden stall while driving: If the relay fails intermittently or overheats during operation, it can cut power to the fuel pump and ignition coils mid-drive. The engine will shut off without warning. In some cases, the vehicle restarts after the relay cools down, only to stall again once it reaches operating temperature — a pattern that strongly points to a heat-related relay failure.
- Flickering or erratic dashboard behavior: Corrosion inside the relay can cause a fluctuating connection, leading to rapid cycling of power to various vehicle systems. Dashboard warning lights may flash, gauges may behave erratically, or accessories may cut in and out without any clear trigger.
- Dead battery after the vehicle sits overnight: A relay that fails in the closed position (contacts stuck closed) will allow current to flow continuously to the ignition system even with the key removed. This creates a slow parasitic drain that can flatten the battery in 8–24 hours depending on the draw and battery capacity.
- Burnt or melted smell from the fuse box area: In severe overload situations, the relay can overheat to the point of partially melting. If the relay fuses to the socket, it can damage the relay panel itself, sometimes requiring the entire fuse box to be replaced — a significantly more expensive repair than a simple relay swap.
These symptoms are not exclusive to the ignition relay — a bad fuel pump, failing ignition switch, or damaged wiring can mimic identical conditions. Always perform basic checks (battery voltage, fuse continuity, wiring integrity) before concluding the relay is at fault.
How to Test the Ignition Relay Before Replacing It
Testing the relay takes about five minutes with basic tools and can save you from an unnecessary parts purchase. The most reliable methods are a simple swap test and a direct bench test with a multimeter.
The Swap Test (No Tools Required)
Open the fuse box and identify a relay that is the same shape and pin configuration as the suspected ignition relay but controls a non-essential function — a rear wiper relay, seat heater relay, or horn relay works well. Pull both relays out, swap them into each other's slots, and attempt to start the vehicle. If the car now starts, the original ignition relay was defective. If the problem moves (for example, the rear wiper no longer works), that also confirms the faulty unit. This test costs nothing and takes under two minutes.
The Bench Test with a Multimeter and Battery
Remove the relay from the fuse box. Identify the four pin numbers on the relay body: 30, 85, 86, and 87. Connect a 12-volt supply wire to pin 30 and pin 85. Ground pin 86 to the battery's negative terminal. You should hear a clear click as the relay's internal contacts close. Then use a multimeter set to DC voltage and probe pin 87 — you should read 12 volts when the relay is energized. If you get 0 volts or the relay produces no audible click, the internal contacts or coil are burned out and the relay needs replacement.
For a more thorough test, check the coil resistance across pins 85 and 86. A healthy relay coil typically reads between 50 and 120 ohms. A reading below 1 ohm indicates a short-circuited coil; an open-circuit reading (infinite resistance) means the coil wire is broken internally.
The Click Test In-Car
Have a second person stand near the fuse box while you cycle the ignition from Off to On (not to Start). A working relay produces a distinct click each time the key is switched. No click when the ignition is turned on — combined with starting problems — is a strong indicator of relay failure or an issue with the relay's control circuit wiring.
Ignition Relay vs. Starter Relay — Understanding the Difference
These two components are frequently confused, and the confusion is understandable because both relays are involved in the starting process and often sit in the same fuse box. However, they serve different functions and fail in different ways.
The starter relay (also called the starter solenoid relay on some vehicles) acts as the switch between the battery and the starter motor. Its sole job is to send a burst of high current to the starter motor when you turn the key to the "Start" position. Once the engine fires, the starter relay opens and the starter disengages. The starter relay is typically found in the engine bay fuse box, though on some vehicles it mounts directly to the starter motor body or near the battery.
The ignition relay controls ongoing power to the fuel pump, ignition coils, and engine management system during normal operation — not just during cranking. It activates when the key moves to "On" and stays on as long as the engine is running.
A quick diagnostic distinction: if the starter motor spins normally but the engine still refuses to run, the starter relay is probably fine and the ignition relay (or fuel pump) is the more likely cause. If there is no starter motor action at all — no cranking, no click from the solenoid — the starter relay or starter motor itself deserves closer attention first.
Ignition Relay Replacement Cost and Process
Replacing the ignition relay is one of the more affordable automotive repairs. The relay itself costs between $5 and $50 depending on whether you purchase an OEM part or an aftermarket equivalent and the specific vehicle model. Labor costs are minimal because the job typically takes under 30 minutes — the main work is identifying the correct relay slot rather than any mechanical disassembly. If you have a mechanic do the replacement, expect a total bill in the range of $15 to $100 including parts and labor.
The replacement process for a standard plug-in relay is straightforward: pull the old relay straight out of its socket, inspect the socket terminals for corrosion or burn marks, clean any oxidation with an electrical contact cleaner and a small wire brush if needed, then press the new relay firmly into the same slot. Confirm the relay is fully seated by trying to wiggle it — a properly installed relay has no side-to-side movement.
If the relay socket itself is burned or the terminals are damaged, the socket will need to be repaired with a pigtail connector splice before installing the new relay. Skipping this step and simply installing a new relay into a damaged socket will likely cause the replacement relay to fail prematurely for the same reason.
In the rare case where a relay overheats badly enough to melt into the fuse panel, the entire relay board or fuse box may need replacement. This is significantly more expensive — fuse box assemblies for common vehicles range from $50 to $300 for the part alone, with additional labor costs for installation and any required programming.
Common Causes of Ignition Relay Failure and How to Prevent Them
The ignition relay is a durable component with few moving parts, but it does fail over time. Understanding the root causes helps you extend relay service life and avoid repeat failures after a replacement.
- Heat exposure: Engine bay temperatures regularly exceed 100°C in hot climates or under heavy load. Prolonged heat degrades the relay's internal plastic housing and accelerates contact wear. Ensuring the fuse box cover is always properly seated after any service work reduces heat infiltration from direct engine sources.
- Moisture and corrosion: Water intrusion through a missing or cracked fuse box cover causes oxidation on the relay pins and socket terminals. This resistance buildup forces the relay to work harder, generating more heat and accelerating failure. Inspect fuse box seals during routine maintenance.
- Electrical overload: If a short circuit elsewhere in the system forces excessive current through the relay, the internal contacts can weld together or burn out. A properly rated inline fuse protects the relay circuit; a missing or incorrectly rated fuse leaves the relay vulnerable.
- Vibration fatigue: The relay's solder joints and internal connections can crack over time due to engine vibration, especially on high-mileage vehicles. This often produces intermittent behavior where the relay works when cold but fails when the vehicle warms up and vibration patterns change.
- Age and contact wear: Each time the relay switches, the contacts experience a small electrical arc that gradually erodes the contact surface. After many thousands of switching cycles over years of operation, the contacts may no longer close completely, causing voltage drop or complete circuit failure.
When to See a Professional Mechanic
Replacing a plug-in relay is a task most vehicle owners can handle without professional help, provided they correctly identify the right relay using verified fuse box documentation. However, certain situations warrant professional diagnosis rather than self-service relay swapping.
If a new relay fails again within a short period, the problem is almost certainly upstream — a short circuit, an overloaded circuit, or damaged wiring that caused the original relay failure in the first place. Replacing the relay a second time without fixing the root cause will only result in a third failure. A professional with a wiring diagram and a circuit tester can trace the fault to its origin.
Similarly, if the relay socket is visibly burned or the fuse box shows signs of heat damage, professional repair is necessary. Attempting to install a new relay into a compromised socket can create a fire hazard, particularly if the damaged wiring is near flammable materials under the dashboard.
Finally, if the vehicle uses a smart relay integrated into a body control module (BCM) or uses a solid-state relay rather than a traditional electromechanical relay, diagnosis requires a scan tool capable of reading BCM data. These systems cannot be tested or replaced using the methods described above for standard plug-in relays.


